Friday, September 30, 2011

Project: 'If the Shoe Fits' Witch

The other day, I went blog surfing to find fun Halloween craft ideas. I came across a gal who made a pillow with 3 witches on the front and stitched above the characters were the words: "If the Shoe Fits" CUTE! I wanted to recreate the project without the sewing...here is what I came up with: 
I ran to Home Depot and grabbed a piece of wood from their scrap pile for 50 cents. :0) Then I pulled out my fabric scrap box and got some pieces while thinking to myself, 'What would a witch wear?" 
Then I cut and placed the fabric on the board starting from the boots and worked on up! 
For the skirt, even though I knew everything would be 'mod-podged' down, I still wanted a layered effect. So I cut multiple strips of fabric, and placed them where I wanted them. (That's why I love crafting without patterns...anything goes!) 
Then I painted, and sanded, and let the board dry...
Then I started gluing down the pieces of fabric with my trusty ol mod-podge. :0) *again starting from the boots up! 
Almost done... 
Wah-lah! After gluing was done, I slapped on a few coats of Polyurethane to give it a nice glossy look, and it helps harden everything together. :0) I just might have to find some cute vinyl lettering for her apron...we'll see. I am loving that this craft only cost me .50 though...
Now it will be nice and dry when I decorate tomorrow! Yeehaw!

Project: Easy Halloween Decor

What you need:
Picture Frame (I found mine in the $1 bins at Target)
Festive Scrap Paper
Halloween-y vinyl or stickers
Scissors 
I cut out the cute paper to fit inside the frames, and stuck the cute vinyl on the paper. I was tempted to vinyl the outside of the frame, but I hope to use these cute frames for some other holidays.
The vinyl doesn't have to be characters, you could use letters as well! I thought of doing B O O! or E E K! The possibilities are endless.
Cute and Easy! I love Halloween!

Wednesday, September 21, 2011

Project: DIY Nursery Mobile

I have been searching the market looking for cute rocket mobiles to match my new nursery. I found quite a bit, but either the colors weren't right or they were just too expensive...
I was inspired by my new baby comforter that came with my new baby bedding set! I went searching around the house and found...
...some Fun Foam, and glue and scissors...
and free handed these babies. A tip for free handing anything that I find useful. Freehand your first one, then use that one to trace any multiples. That way no one will question your freehand work, including you! :0)
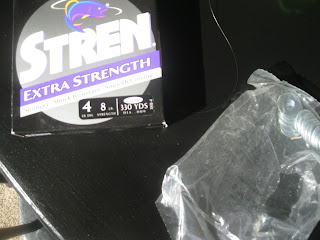
Then I grabbed my husband's fishing line, and thought about using some type of weights for the bottom. (I didn't end up using the weights.) 
Then I cut and painted a 1/2 inch dowel. Then I drilled holes with a 1/16 drill bit.
Then I started stringing making sure I had a pattern in place before I began. 
Loving how it looks in the nursery. Here's a peek! Next Nursery Project: Curtains!

Monday, September 12, 2011

Katie was featured!

Thanks Craft Goodies for featuring Katie's White Stitch Pants Project. Big Smiles all around. :0)

Friday, September 9, 2011

Project: New Dresser for the Girl...

There has been a shift at my house! We found out we are having a BOY! We are so excited, but things are already shifting to make room for this one. Like...the Changing Table was being used as my son's dresser, and that was recently moved into our nursery. (It's almost done! I'm excited for you to see it.) And since this baby is a boy, my second born and him will be sharing a room in the future. So they get the bunk beds and the dresser that matches it...which was in my little girls room. After all the shifting was done, my little girl was out a dresser....Can you guess what happened next?!?...Goodwill was calling my name!....
I found this beauty...well it isn't really beautiful, yet. But it's workable. My cute husband really didn't want to buy it because he didn't like the colors...Isn't he funny? He should have known I was planning on painting any dresser I found.
So pictured above is the Before picture of the dresser. The paint splatters were a PAIN to sand down. If you look really close at the finished project there are still some bumps...but it'll do. :0) It was fast and easy to paint because I had two wonderful helpers.
(*Pregnant peeps! Please be sure to paint in a ventihilated area WITH a mask.*)
Beautiful white. Love it!
I had to run to JoAnn's to grab a few things (they are having a great sale on all the Fall floral!) I found these in a pack of 7 in the scrapbooking section for a dollar. I thought they were stickers and tried for a little bit this morning to peel off the backs of these babies...haha they are something called Chipboard...they are not stickers. But, no need to fear!...
...Mod Podge is here!!! :0) Love this stuff. Apply to the area, then apply on the back of the chipboard and stick. I also smoothed some 'Podge' around the edges to make sure it was super sealed.
Not dry yet, but I love how it looks in her pink bedroom! A nice clean 'new' dresser for my girl.
Happy Painting everyone!

Thursday, September 8, 2011

Project: Cheap Hostessing Tricks...

Left over "Kerr" jars are perfect for holding icecream toppings!

I love dishes, but my serving dishes are limited due to lack of funds for serving dishes...so I had to come up with something quick and cute! I found six or so odd shaped jars, wrapped some rafia around em' & filled em' with yummy chocolate chips, nuts, crushed Oreo, and strawberries. I even used them to hold spoons, and napkins!

Happy Hostessing!


Saturday, September 3, 2011

Healthy Low-fat Banana Zucchini Bread

These made my house smell fall-ish. I love the smell of Fall. I found the recipe online, and made some tweaks here and there. You won't be sorry you tried this recipe. 
Gotta love Low-fat Margarine...hehehe.
I used two cups flour, instead of using wheat flour. I left out the cinnamon, only because I used Applesauce with Cinnamon. And I also left out the raisins, because my pregnancy tastebuds found the thought of it revolting. :0) I also haven't invested in a second loaf pan. So I used the rest of the batter for muffins (as pictured above.) Delicious. And smells wonderful!

Directions:

Read more: http://www.food.com/recipe/healthy-low-fat-banana-zucchini-bread-239027#ixzz1WS1LPpOO

  1. Preheat oven to 350 degrees.
  2. Whisk together white flour, wheat flour, oats, baking powder, baking soda, cinnamon, allspice, nutmeg, and salt.
  3. In a separate bowl, beat the eggs.
  4. Add the sugar, oil, applesauce, and mashed bananas to the eggs; mix well.
  5. Add the vanilla.
  6. Combine the wet and dry mixtures. Stir until just combined.
  7. Fold in the zucchini and raisins.
  8. Pour into 2 lightly greased loaf pans (9x5-inch).
  9. Bake for 45-50 minutes or until a knife comes out clean.
Cheers!