Showing posts with label Halloween. Show all posts

Wednesday, October 12, 2011

Project: Milk Jug Ghost Lanterns

We had such a fun night the other night making these cute lanterns that I just had to share.  I got the idea from here.

We've been gathering milk jugs for the past couple of weeks and we are going to keep adding to our line-up until halloween.

Supplies:
Milk jugs
Permanent marker
X-ACTO knife (box-cutter, razor blade etc etc)
Christmas lights

 Start, of course, with a washed out, empty milk jug.  With permanent marker draw a ghost face on the side opposite the label.
 Cut a hole in the bottom of the backside and stuff several of the lights inside.
 Create your line-up!  For more exact instructions you can check out the link I mentioned before.  My kids had a blast creating their own scary ghost faces.  I used some of my icicle lights and wove the extras through the bushes.


And, of course, we always have to have a fun treat to go with it!  I just love my desserts I guess :)  Today we had:

"Treasure-Filled Apples"

I am kind of a picky produce person.  I had some apples that weren't quite perfectly fresh, still fine, but .....you know.  So they weren't being eaten.  Baking them is the perfect solution!  
 I have this really fun cookbook my mother in law gave to me on my birthday (she knows me well :) and this particular treat was in the snack section!  I personally think it is much much too sweet to be considered anything but a treat or dessert.  And my kids thought this was great.  I loved hearing their gasps and oohs and ahhs as they opened up their apples
And at first it almost does look slightly halloweeny creepy I think!  Then I cut them up for them and the sweet juices spilled out and there were red hot candies everywhere (which they love).  They all just gobbled them up!  I enjoyed mine, but couldn't finish it.  It was very sweet, very tasty, but very sweet.  The bites with the red hots were especially yum!

So here's the recipe:

6 medium tart apples
1/2 cup sugar
1/4 cup red-hot candies
1/4 teaspoon ground cinnamon

1. Cut tops off apples and set tops aside. Core apples to within 1/2 inch of bottom.  Place in a greased 8-inch square baking dish.
2.  In a bowl, combine, sugar, candies and cinnamon; spoon 2 tablespoons into each apple.  Replace the tops.  Spoon any remaining sugar mixture over the apples.
3.  Bake, uncovered, at 350 degrees for 30-35 minutes or until apples are tender, basting occasionally.

Yield: 6 servings

Super duper easy.  I like that :)

Photobucket

Thursday, October 6, 2011

Project: 2x4 Halloween Faces

Happy Halloween faces! I've been inspired by all the fun 2x4 crafts floating around blog-land. I had to play...
I got my wood from the scrap pile at Home Depot. And grabbed some new fun colors of craft paint from Wal-Mart. *They have a starter kit with 6 colors for only 4.97! Not bad. I first sanded my blocks, then painted away...
Mummy Man
Frankenstein 
Pumpkin Head 
Lil Witch

After they dried, I slapped on a coat of Polyurethane for a nice glossy look, then glued on the accessories. These pals would be fun on any shelf, or given away as a set to a deserving friend. :0)

Project: Kool-Aid Play Dough for Halloween

I made the dough the night before. Kneading until not sticky takes FOR.E.VER! I would suggest a motorized kneader. :0)
Here is how you make it:
Mix together 3 cup flour, 1/2 cup salt, 3 pkg. unsweetened Kool-Aid (any flavor...I used orange pictured above)
Mix together and add to dry mixture 3 TBSP cooking oil and 2 cup boiling water.
Knead until not sticky. It will last longer if you store in airtight container. The Kool-Aid makes it smell great and seem edible. Be sure to warn your kids that it won't taste as nice as it smells. :0)

Wednesday, October 5, 2011

Project: Milk Jug Skeleton

Meet Mr. Bones! He was our special guest at my Preschool Co-op today. The kids got to find his already assembled arms and legs to help put him back together while learning the song "Dem Bones". Great activity for little ones! I found some instructions off ehow.com and modified them a bit. Start saving your old Milk Jugs!

Materials:
  • 6 clean plastic gallon jugs
  • String (I used Fishing Line)
  • Scissors
  • Glue gun
  • Hole Punch
Head (First jug):
Turn the first jug upside down. In the corner opposite the handle, cut out a large smiling mouth centered under the eyes. Make two small slits in the top of the head and tie a loop of string through them for hanging the finished skeleton.
Chest (Second jug):
Cut a vertical slit down the center of a right side up jug, directly opposite the handle. Cut and trim away plastic to make the rib cage. Glue the head and chest together at the neck by connecting he spouts of the two jugs with a thick band of hot glue. Hold the jugs together for a few minutes until the glue cools.
Shoulders (Third and Fourth jug):
Cut of two jug handles (leaving a small collar on the ends) and attach them to the chest section with hot glue. Punch a hole at one end of each shoulder.
Hips (Third jug):
Cut all the way around a jug, about 4 1/2 inches up from the bottom. Take the bottom piece and trim away a small smile shape from each side to make a four-cornered shape. Punch holes in the front two corners.
Waist (Third and Fourth jug):
Cut out two spouts, leaving a 1/2 inch collar on each. Glue the spouts together and let dry. Hot glue the waist to the bottom of the chest section and to the top of the hip section.
Arms and Legs (Fourth and Fifth jug):
Cut eight long bone shapes (ovals) from two jugs. I was able to get 4 ovals from one jug, starting from the top down to the bottom. From four of the 8 bones, cut out the center to make lower limbs (forearms and shins). Punch a hole through the ends of all eight bones. Use string to tie two arm sections to each shoulder and two leg sections to each hip.
Hands and Feet (Sixth jug):
 Let kids trace their hands and feet onto the side of a jug, then cut out the shapes. Punch holes in the hands and feet, and tie them onto the arms and legs.

*For this particular Preschool activity I assembled everything the night before, but didn't tie on the arms and legs. The kids got to go on a hunt to help Mr. Bones find his bones!*

Tuesday, October 4, 2011

Project: Ghost Tree and Old Dusty Mantle

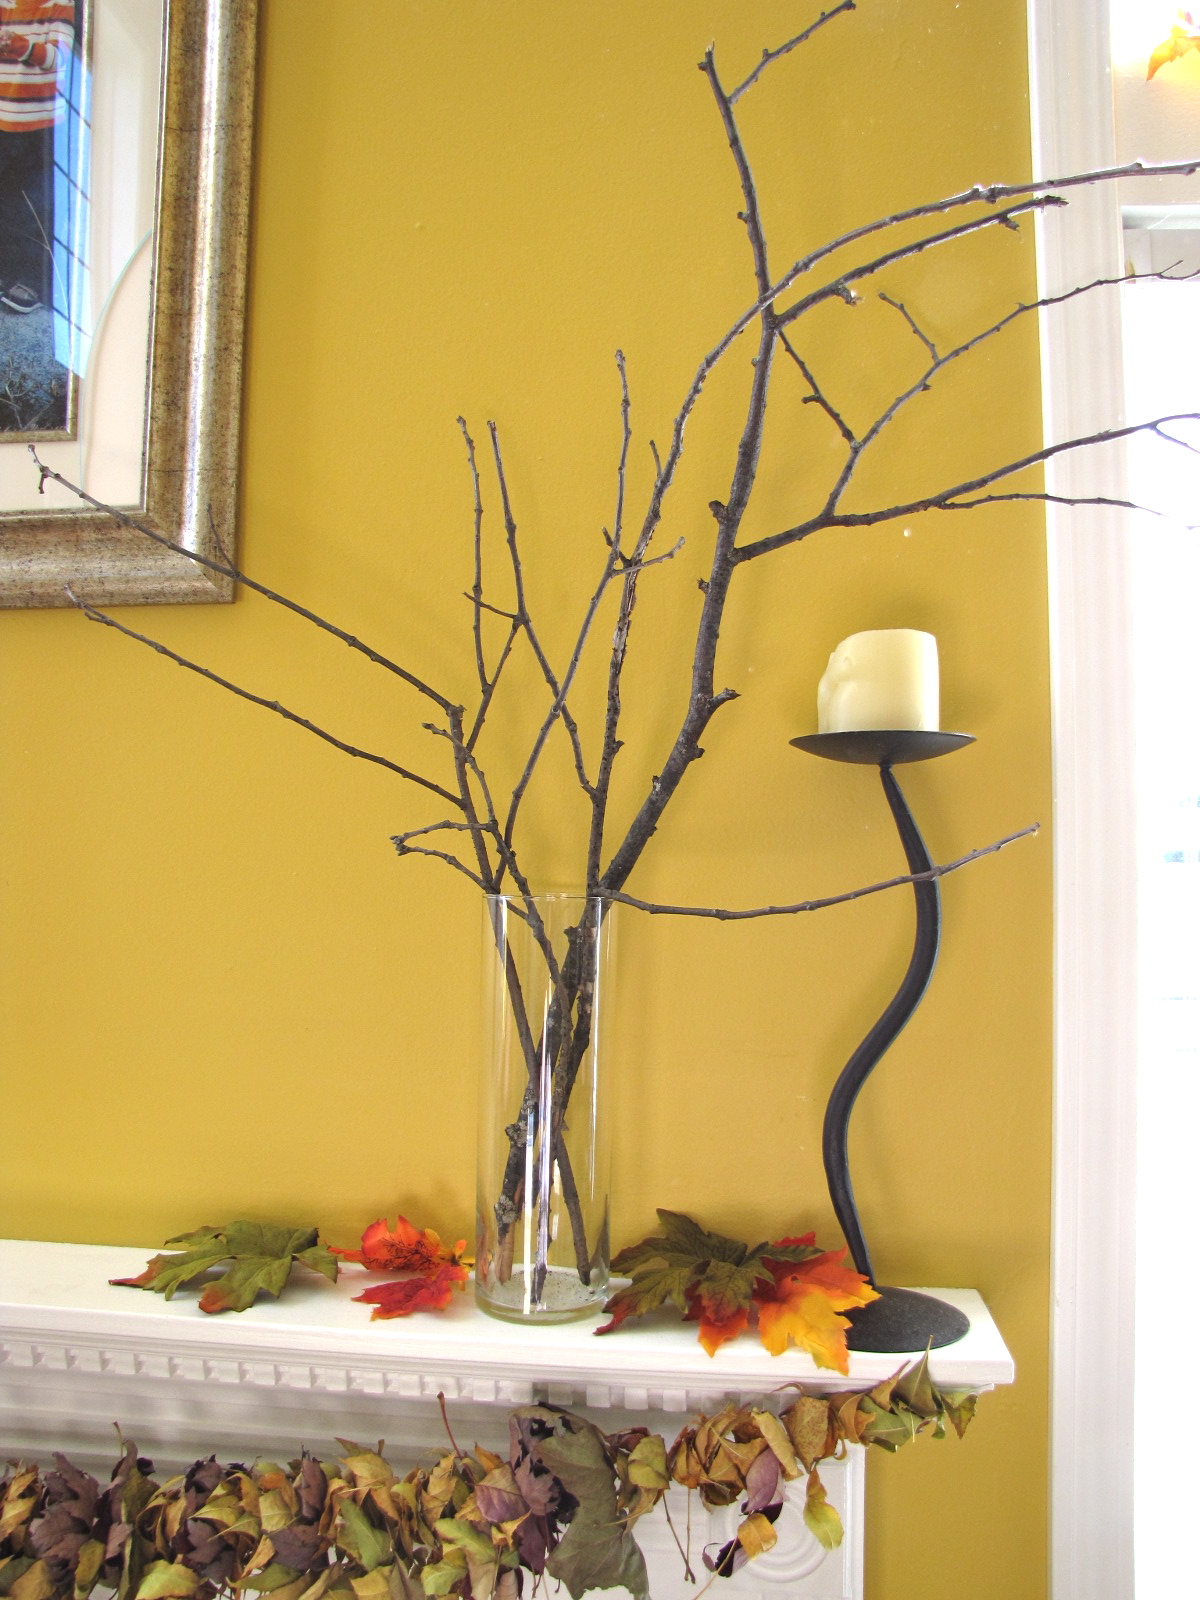
We were walking to the "park in the woods" -as my children call it-  the other day and I was noticing all of the branches lying on the ground.  It really is a park in the woods.  We have lots of those, woods that is, in good old Illinois.  I was thinking of how all these trees will soon shed their leaves and go from gorgeous to barren and my mind started working.  Think of all the things that could be done with those discarded branches!  Well, I'm starting with Halloween :0)

So, naturally, on the way home we gathered a few
 I arranged them in a tall vase on my mantle.....and I made some little ghosts.
 They are super super easy. Just cut a square of material.  The larger the square, the larger the ghost.
 Wad up a ball of either tin foil or plastic wrap.  I used plastic wrap because my fabric was so thin.
 Scrunch the fabric around the ball and tie a ribbon around the neck.
 Hot glue a little piece of ribbon to the back of the head and draw a little face.  Depending on your fabric a marker may bleed (mine did a bit).  You could paint them just as easily.
 Hang those cute little ghosts on your branches and you have a haunted tree on your mantle!  I added some marbles to the base to weigh it down a little bit and hold the branches in place.  Notice how the bottom edges of the ghosts are pointy?  If you want them flowy cut circles instead of squares.

Now Halloween is one of those holidays that just calls for a highly decorated mantle.  They just kinda go together!  So, having an extreme lack of decorations I headed to Goodwill and the dollar store.
 I spent around $12 then added some black spray paint.....And some candles :)  Then I copied Jana's "If the Shoe Fits" project and I LOVE it!!
 And I have a gaudy mantle full of drippy candles that just has old dusty house written all over it.
Halloween is just so much fun!


Photobucket

Saturday, October 1, 2011

Project: Caramel Apples and Autumn Leaves

My first grader went on a field trip to an apple orchard.  She came home with all kinds of stories to tell and uber excited about how we could make apples with caramel and chocolate and nuts and sprinkles with little sticks and.......  :0)

Much to her dismay there was no caramel to be had in the house and I suggested we make them for our party Friday.  Party!!  What party!?  I love it when I do that.  Come up with something quick and have to think through it later.  SO!  We had a party to decorate for Halloween.
 We, of course started with the carameled apples.  I convinced them to wait a week or two for the chocolate/sprinkled/nutty ones.  We don't know enough people to give the extras away yet!  They are SOOOO easy!  And they really are super yummy.  What you need?

Apples
Sticks
Caramel

I recommend getting small apples.   I got the smallest I could see and not a single one of my kids finished the whole apple.  You can buy caramels, or just get the caramel bits (like me) and melt them.  
Put the sticks in the apple, cover the apple with caramel, scrape the bottom and set them on a cookie sheet covered with greased parchment paper (or tin foil!).
 Put them in the refrigerator for at least an hour and......
 Ta Dah!!!  Caramel apples!  My husband marched around singing "Carameled apples, they are so yummy!  I ate them all and filled my tummy!"  Haha - love that guy :)  I think he was as grateful for the field trip as my 6 year old!

During the days leading up to said party the kids were all kinds of busy planning.  One afternoon we took a walk and collected piles of pretty leaves.
 While we were waiting for the apples to harden we strung them on some string and hung them on the fireplace!
Nothing like bringing the outside in!  And if you've got thread and a needle its completely free!  I wish the oak trees weren't still green.  Those big bright leaves would be beautiful!!  But these little ones work for now.  And it was amazing how quietly the kids worked as they focused on keeping the leaves intact as they strung them.  I'm sure they wouldn't mind making me another one once the rest of the leaves turn :)

More Halloween decorations to come......


Photobucket

Friday, September 30, 2011

Project: 'If the Shoe Fits' Witch

The other day, I went blog surfing to find fun Halloween craft ideas. I came across a gal who made a pillow with 3 witches on the front and stitched above the characters were the words: "If the Shoe Fits" CUTE! I wanted to recreate the project without the sewing...here is what I came up with: 
I ran to Home Depot and grabbed a piece of wood from their scrap pile for 50 cents. :0) Then I pulled out my fabric scrap box and got some pieces while thinking to myself, 'What would a witch wear?" 
Then I cut and placed the fabric on the board starting from the boots and worked on up! 
For the skirt, even though I knew everything would be 'mod-podged' down, I still wanted a layered effect. So I cut multiple strips of fabric, and placed them where I wanted them. (That's why I love crafting without patterns...anything goes!) 
Then I painted, and sanded, and let the board dry...
Then I started gluing down the pieces of fabric with my trusty ol mod-podge. :0) *again starting from the boots up! 
Almost done... 
Wah-lah! After gluing was done, I slapped on a few coats of Polyurethane to give it a nice glossy look, and it helps harden everything together. :0) I just might have to find some cute vinyl lettering for her apron...we'll see. I am loving that this craft only cost me .50 though...
Now it will be nice and dry when I decorate tomorrow! Yeehaw!

Project: Easy Halloween Decor

What you need:
Picture Frame (I found mine in the $1 bins at Target)
Festive Scrap Paper
Halloween-y vinyl or stickers
Scissors 
I cut out the cute paper to fit inside the frames, and stuck the cute vinyl on the paper. I was tempted to vinyl the outside of the frame, but I hope to use these cute frames for some other holidays.
The vinyl doesn't have to be characters, you could use letters as well! I thought of doing B O O! or E E K! The possibilities are endless.
Cute and Easy! I love Halloween!